Receiver Firmware Updating
Requirements
Spektrum Receiver
Latest version of the Spektrum Programmer, found here (3.9.0 as of writing this article) https://spektrumrc.cachefly.net/apps/spektrum_programmer.html
Spektrum Programming Cable SPMA3065 https://www.horizonhobby.com/product/transmitter-receiver-programming-cable-usb-interface/SPMA3065.html
Not required if using receiver with built in USB port. If using built in USB port, make sure the cable can actually transmit data, and isn’t just a “power/charging cable”.
“My Spektrum” Account www.spektrumrc.com/MyAccount/
Note that the account used for www.spektrumrc.com and www.spektrumrc.com/MyAccount/ are not the same, and an account for the latter is the one required.
(Only for SRXL2 Remote Receivers) SRXL2 Update Cable SPMA3066 https://www.horizonhobby.com/product/srxl2-update-cable-receiver-servo-male-and-female-female/SPMA3066.html
This adapter is used with the Spektrum Programming Cable to connect to SRXL2 Remote Receivers.
If using a base receiver with an on-board USB connection, remote receivers can be updated through it (covered below).
At the time of writing this article (7/18/2024), SRXL2 remote receivers include
SPM4651T - DSMX Remote Serial Telemetry Receiver https://www.horizonhobby.com/product/srxl2-dsmx-remote-serial-telemetry-receiver/SPM4651T.html
SPM9747 - DSMX Remote Receiver https://www.horizonhobby.com/product/srxl2-dsmx-remote-receiver/SPM9747.html
Procedure
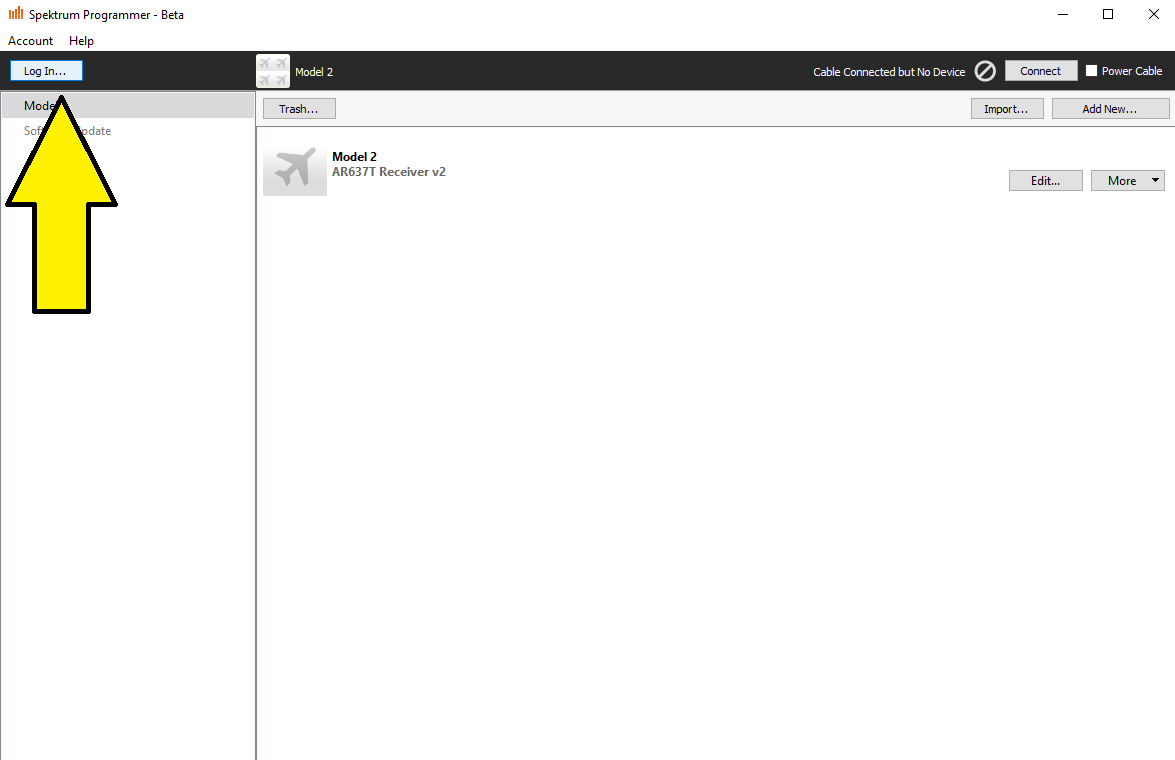
Login
In the Spektrum Programmer, log in to your My Spektrum account.
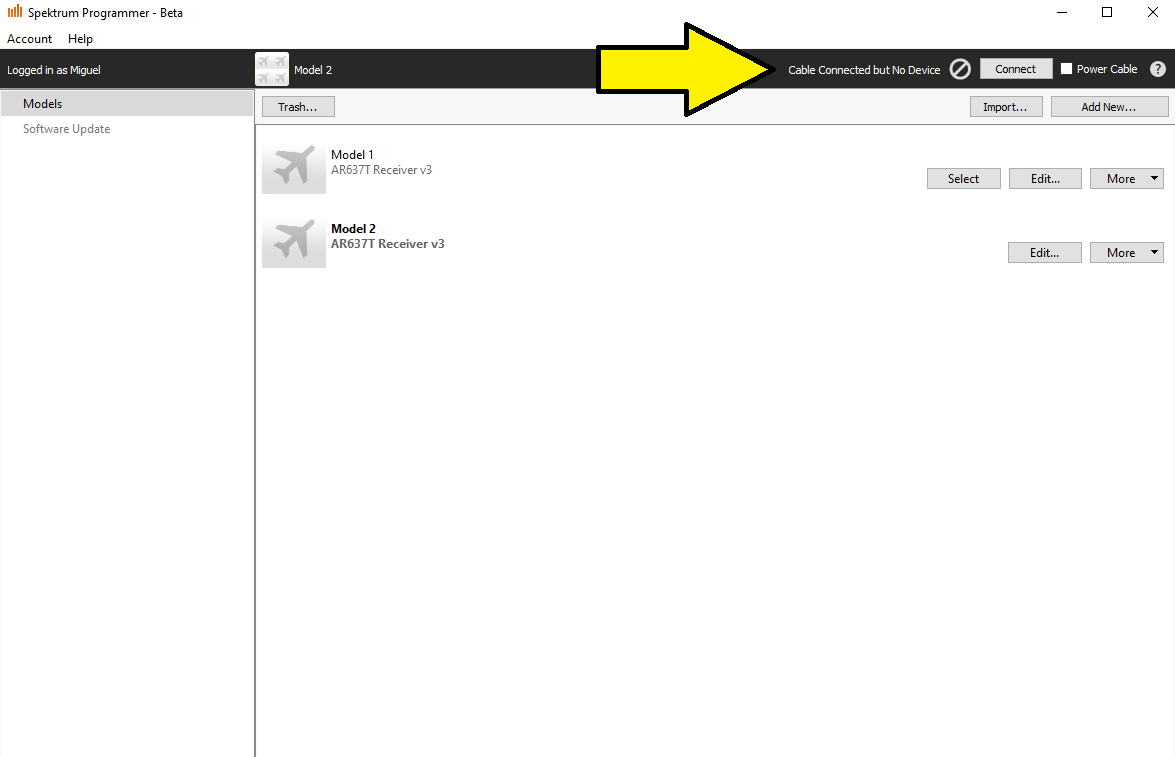
Connect Programming or USB cable to PC
Connect the cable type being used to the PC. When detected by the Programmer software, it will be indicated on the top right.
When using a generic USB cable with supported devices, nothing will show here until the device is also connected.
Connect Device
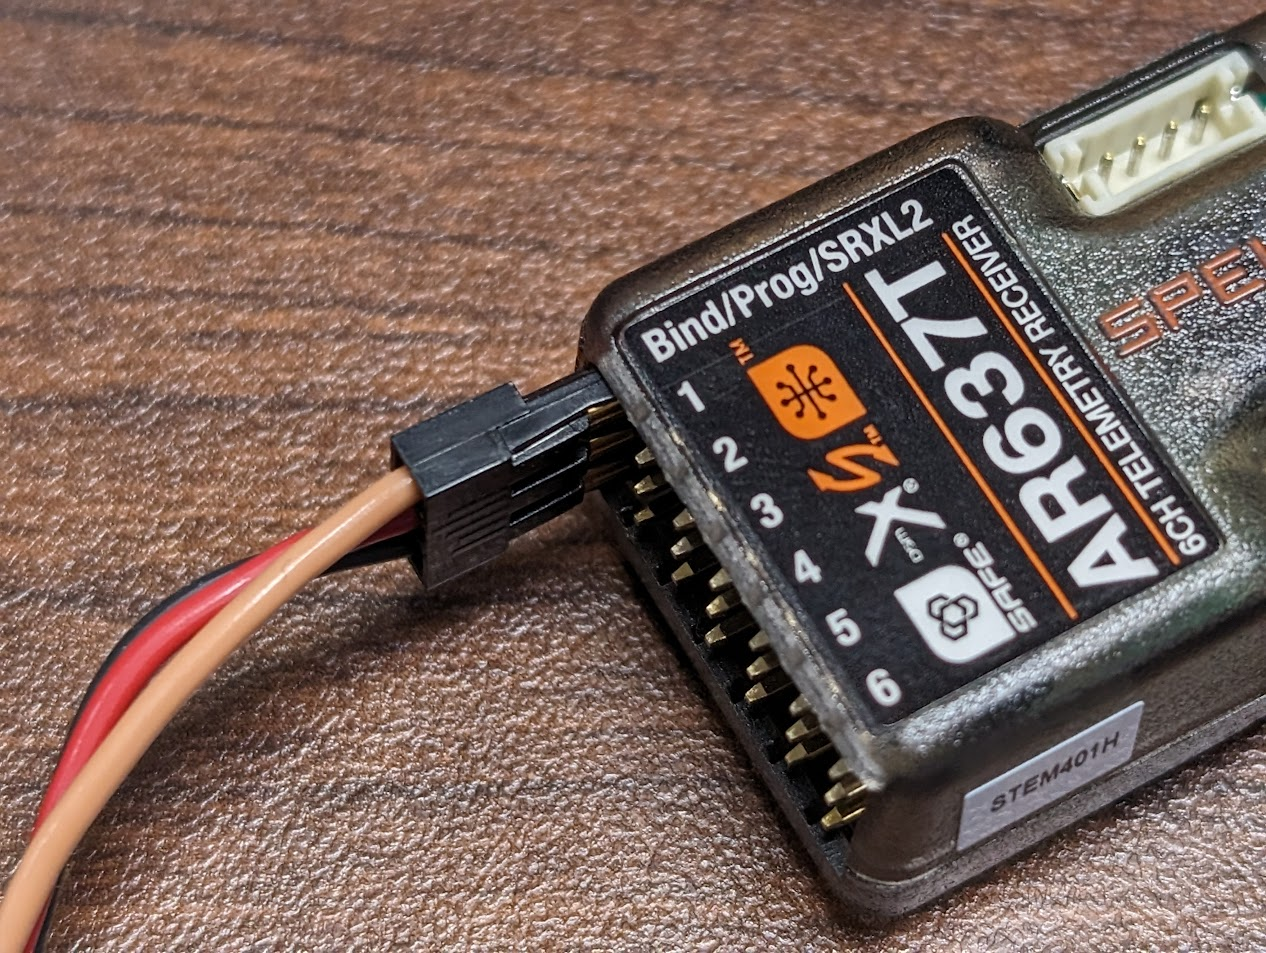
Using Spektrum Programming Cable
Connect the Spektrum Programming Cable to the receivers Prog or Data port.
For some receivers, the Data port can be shared with the CH1/Throttle port.
If using a receiver that shares the Data port with CH1/Throttle, make sure any radio bound to it is not currently connected (either turn it off, sleep it, switch models, etc). An active connection will prevent this port from being used for interfacing with the programmer.
Now the receiver must be powered. There are 2 options for this.
If no servos are connected, the receiver can be powered directly from the programmer.
At the top right check the Power Cable box and then press the Power Cable button form the pop up. Note: The Power Cable box will not work until the app has a programming cable connected.
Otherwise, power the receiver separately with a receiver battery pack, ESC/BEC, etc.
Once powered
If the receiver has a dedicated programming port, it should auto connect.
If the data port is shared with CH1/Throttle, press the Connect button on the top right.
Using Generic USB Cable
With the device off, connect the adequate USB cable to your device.
Note: If a Spektrum Programming cable is connected to the PC, it needs to be disconnected before connecting directly to a receivers USB port.
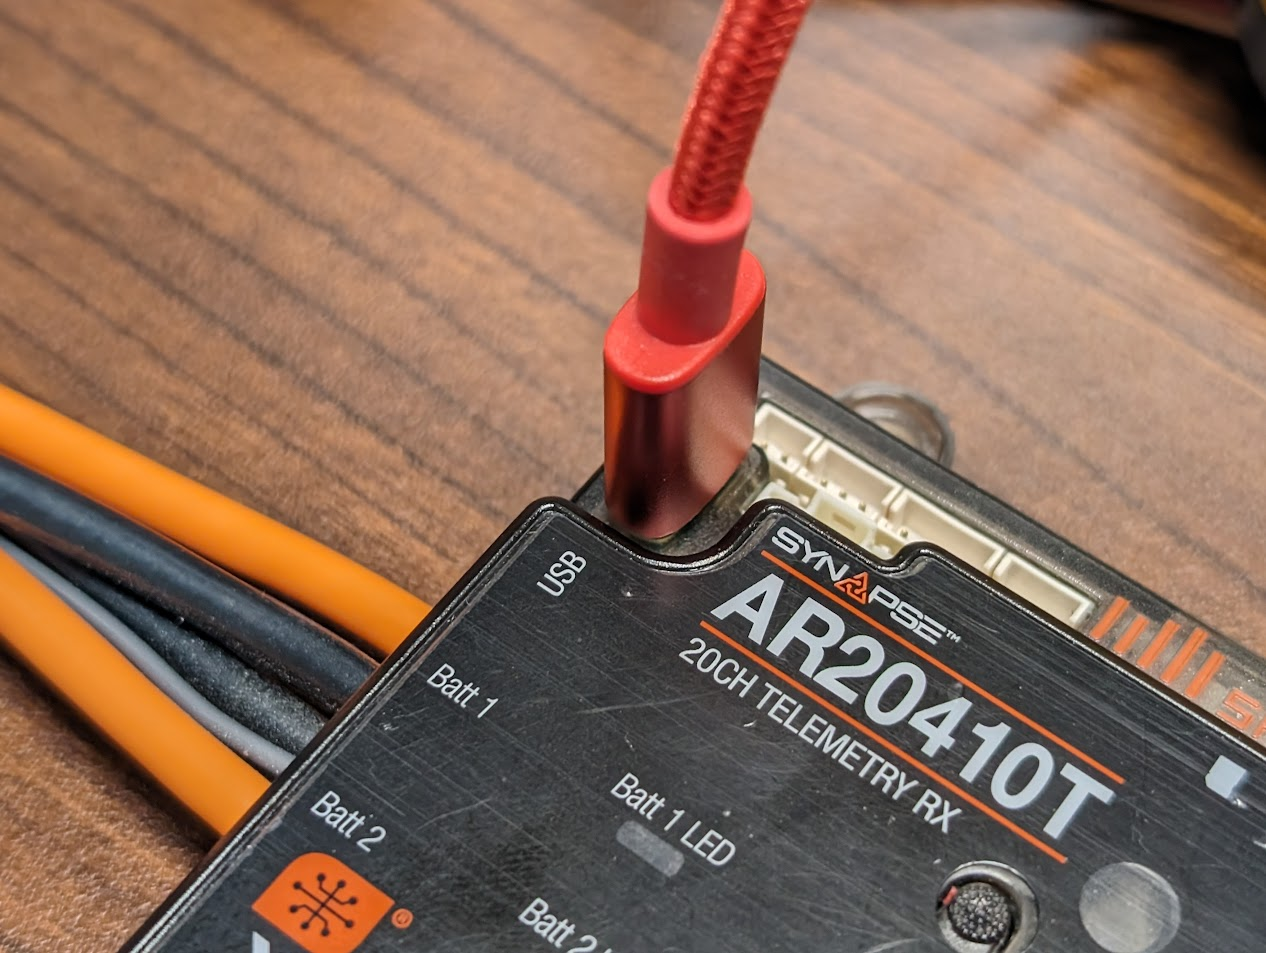
Some devices will automatically power on after connection. Others (such as the AR20410T) with a power button need to be turned on manually with said power button.
If its the first time connecting your device directly through USB, you might need to disconnect it after a moment, and plug it back in as it may have needed to install drivers the first time.
If cable and device have connected this will be indicated at the top right of the screen in the header bar.
Update Device
If the receiver supports model transferring, you will be prompted to sync with a new model or existing model on the Programmer. Skip to step 7 if this doesn’t happen. A brief description of each option is provided below. If still unsure of what to do here, skip to step 6. For more info on this, see the Spekrum Programmer Model Transfer Guide.
Model to Sync - This determines the current model being sync’d to/from.
Show All - Allows you to choose a different model in the programmers list of saved models to sync with. A new model can be created within this menu.
Use Device Settings - This will transfer the devices current setup into the currently selected Model to Sync. This will REPLACE/OVERWRITE the selected model setup on the Programmer!
Use Computer Settings - This will transfer the currently selected model setup from the programmer to the device. This will REPLACE/OVERWRITE the model setup on the receiver with the one selected on the programmer!
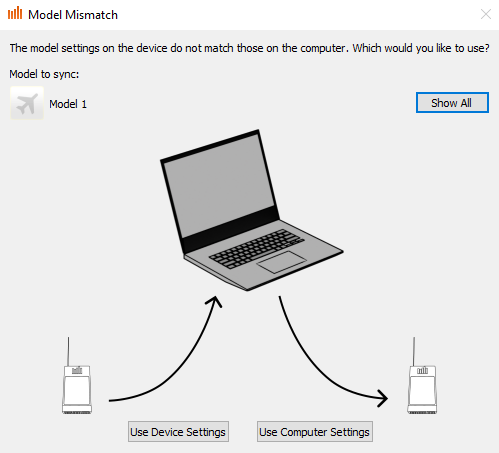
If you’re not sure what do select here, open the Show All menu, select New Model if its not already selected, and then select Use Device Settings. This will create a new model on the programmer with the receivers current configuration.

Once we’ve gotten past the model sync section, select the Software Update tab on the left.
In this page, you will see the device serial number, firmware version, and some update options.
If using a direct USB connection, you will also see options for updating remote receivers connected to the base device.
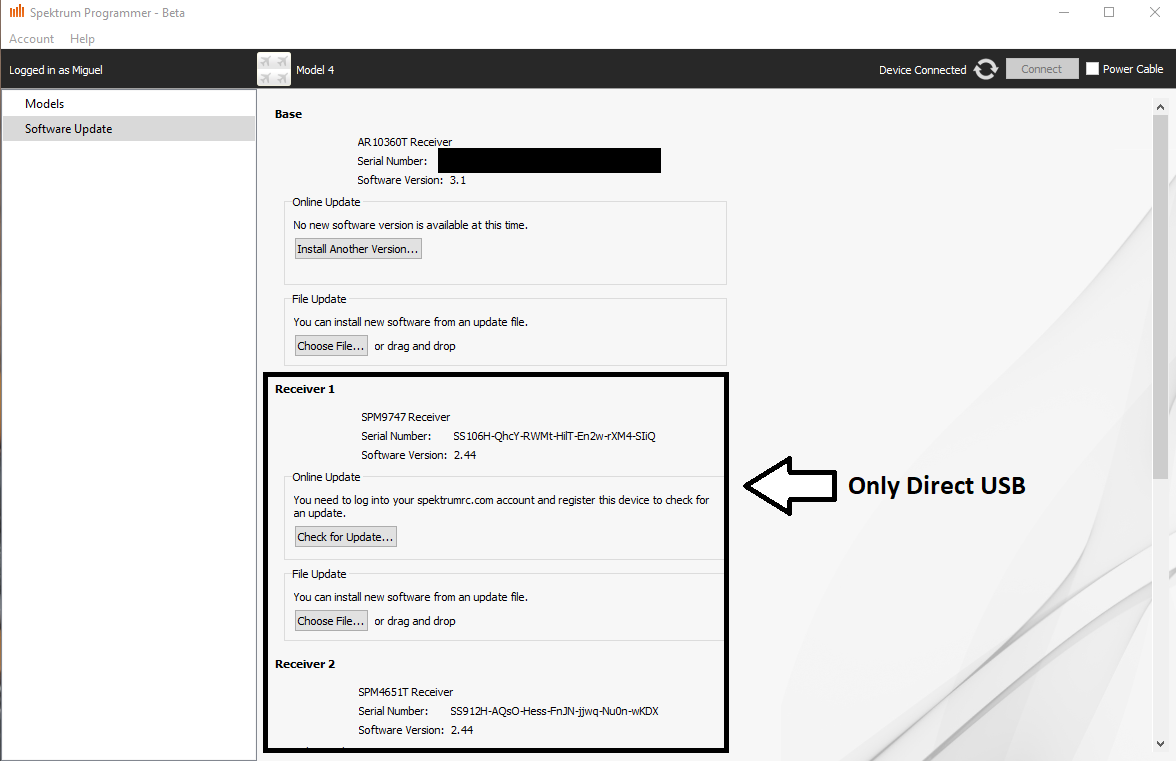
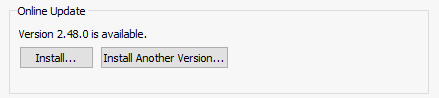
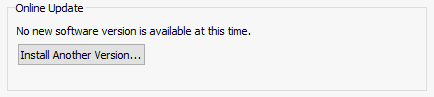
Under the Online Update section, you might see a few options.
Check for Update - This option appears when the receiver hasn’t been registered.
Install - If an update with a later version that the current installed version is detected, this option will appear to automatically install it.
Install Another Version - If the prompted automatic update isn’t desired, or you’re looking for a specific version, use this option to bring up the update list.
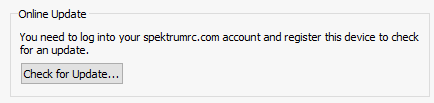
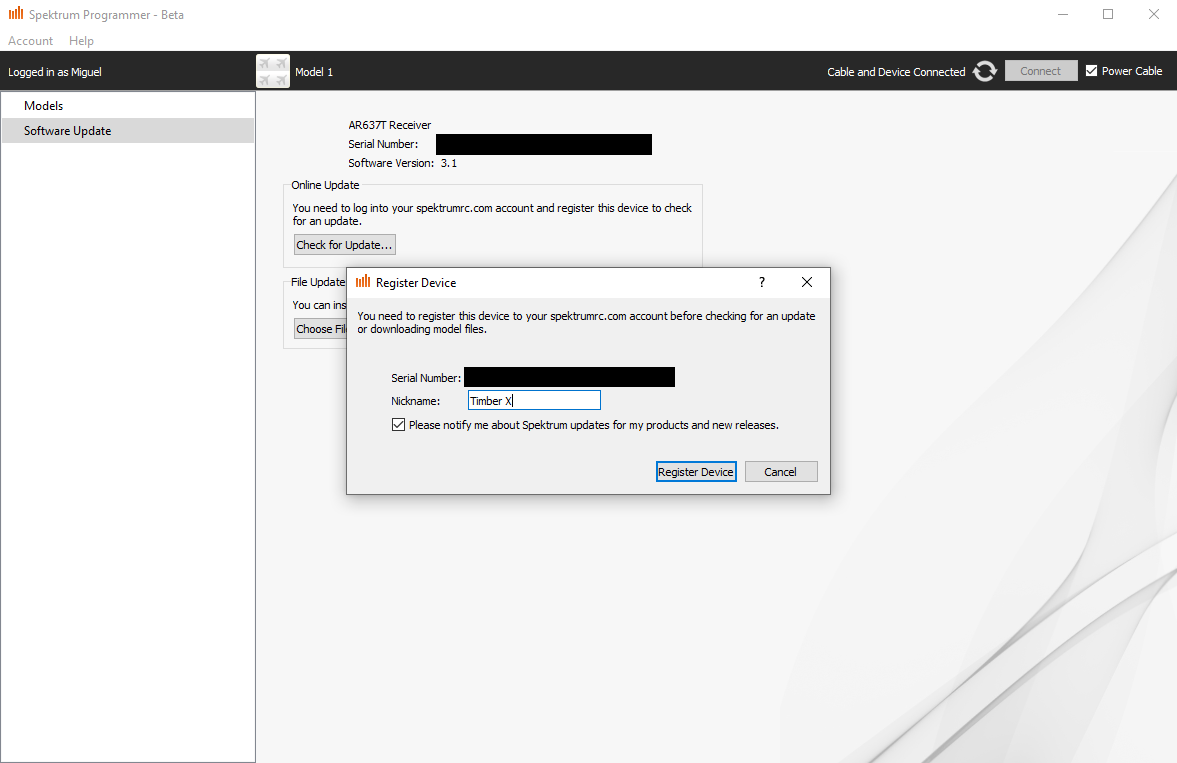
If your device hasn’t been registered, you’ll be prompted to do so. The nickname you enter will be your way to identify the device in the future when looking at your list of registered devices on the website.
Once registered, you’ll have the option to automatically install the latest version with the Install button. Otherwise, you can select the Install Another Version button to see more update options, or even see the changelog for the latest update.
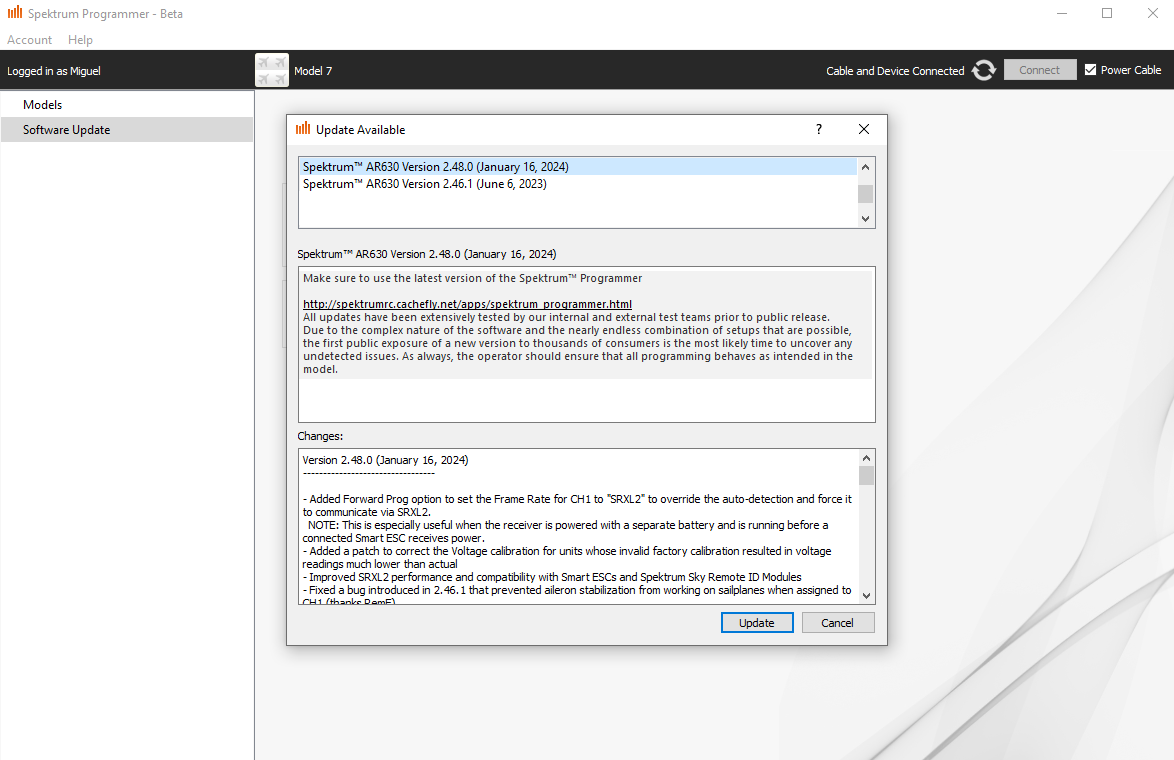
“Install Another Update” option
After selecting the Install or Update option. The receiver should start updating. Once complete, the new version should display on the menu!